How to Document Site Inspections with Photos: A Complete Guide
Poor photo documentation is one of the biggest sources of disputes in construction. Photos taken without context, organization, or labeling become useless weeks later. This guide covers a systematic approach that saves time and creates professional records.
Why Photo Documentation Matters
Every construction project generates hundreds or thousands of photos. Without a system, they become a disorganized mess. Good documentation serves three purposes:
- Legal protection — Timestamped, GPS-tagged photos are evidence in disputes, insurance claims, or warranty issues
- Communication — Photos pinned to floor plans show exactly where an issue is, eliminating back-and-forth
- Progress tracking — Chronological records show how the project evolved, useful for billing and client updates
Step 1: Prepare Before You Arrive
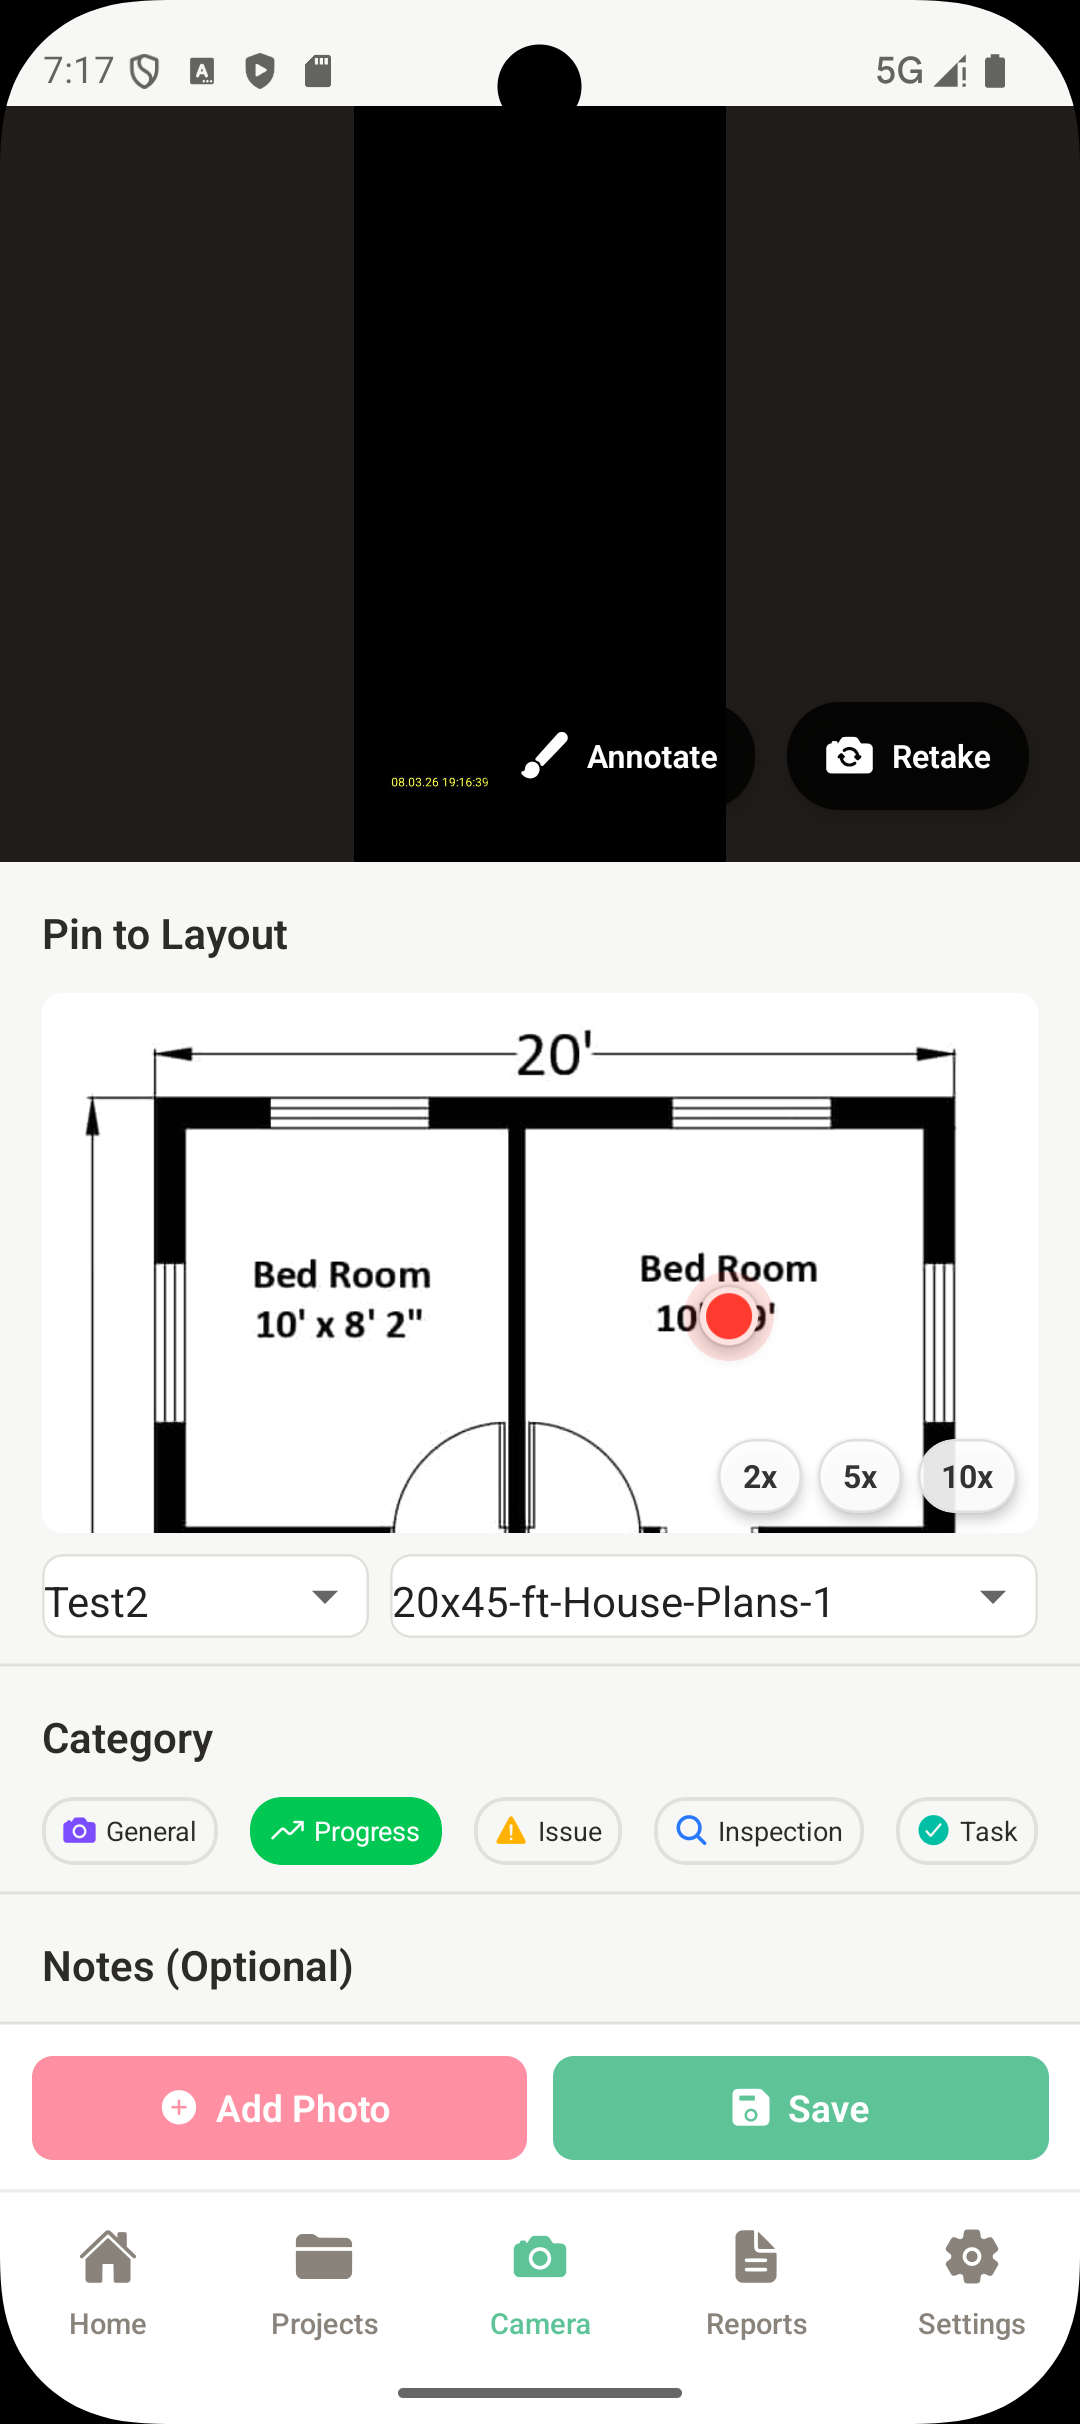
Before heading to the site, know what you need to document. Review the scope of work, previous inspection reports, and outstanding punch list items. Load your floor plans into your inspection app so you can pin photos to specific locations on site.
Charge your phone fully. A typical site inspection generates 50-200 photos, and running out of battery mid-inspection means missed documentation.
Step 2: Shoot Systematically
Walk the site in a consistent pattern — floor by floor, room by room, or zone by zone. For each area:
- Take a wide shot showing the overall area for context
- Take detail shots of specific issues, defects, or progress
- Include reference objects (ruler, tape measure) for scale when documenting defects
- Capture labels and markings (room numbers, structural marks, material specs)
Step 3: Tag and Categorize on the Spot
The moment you take a photo is when you remember the most about it. Tag each one immediately with:
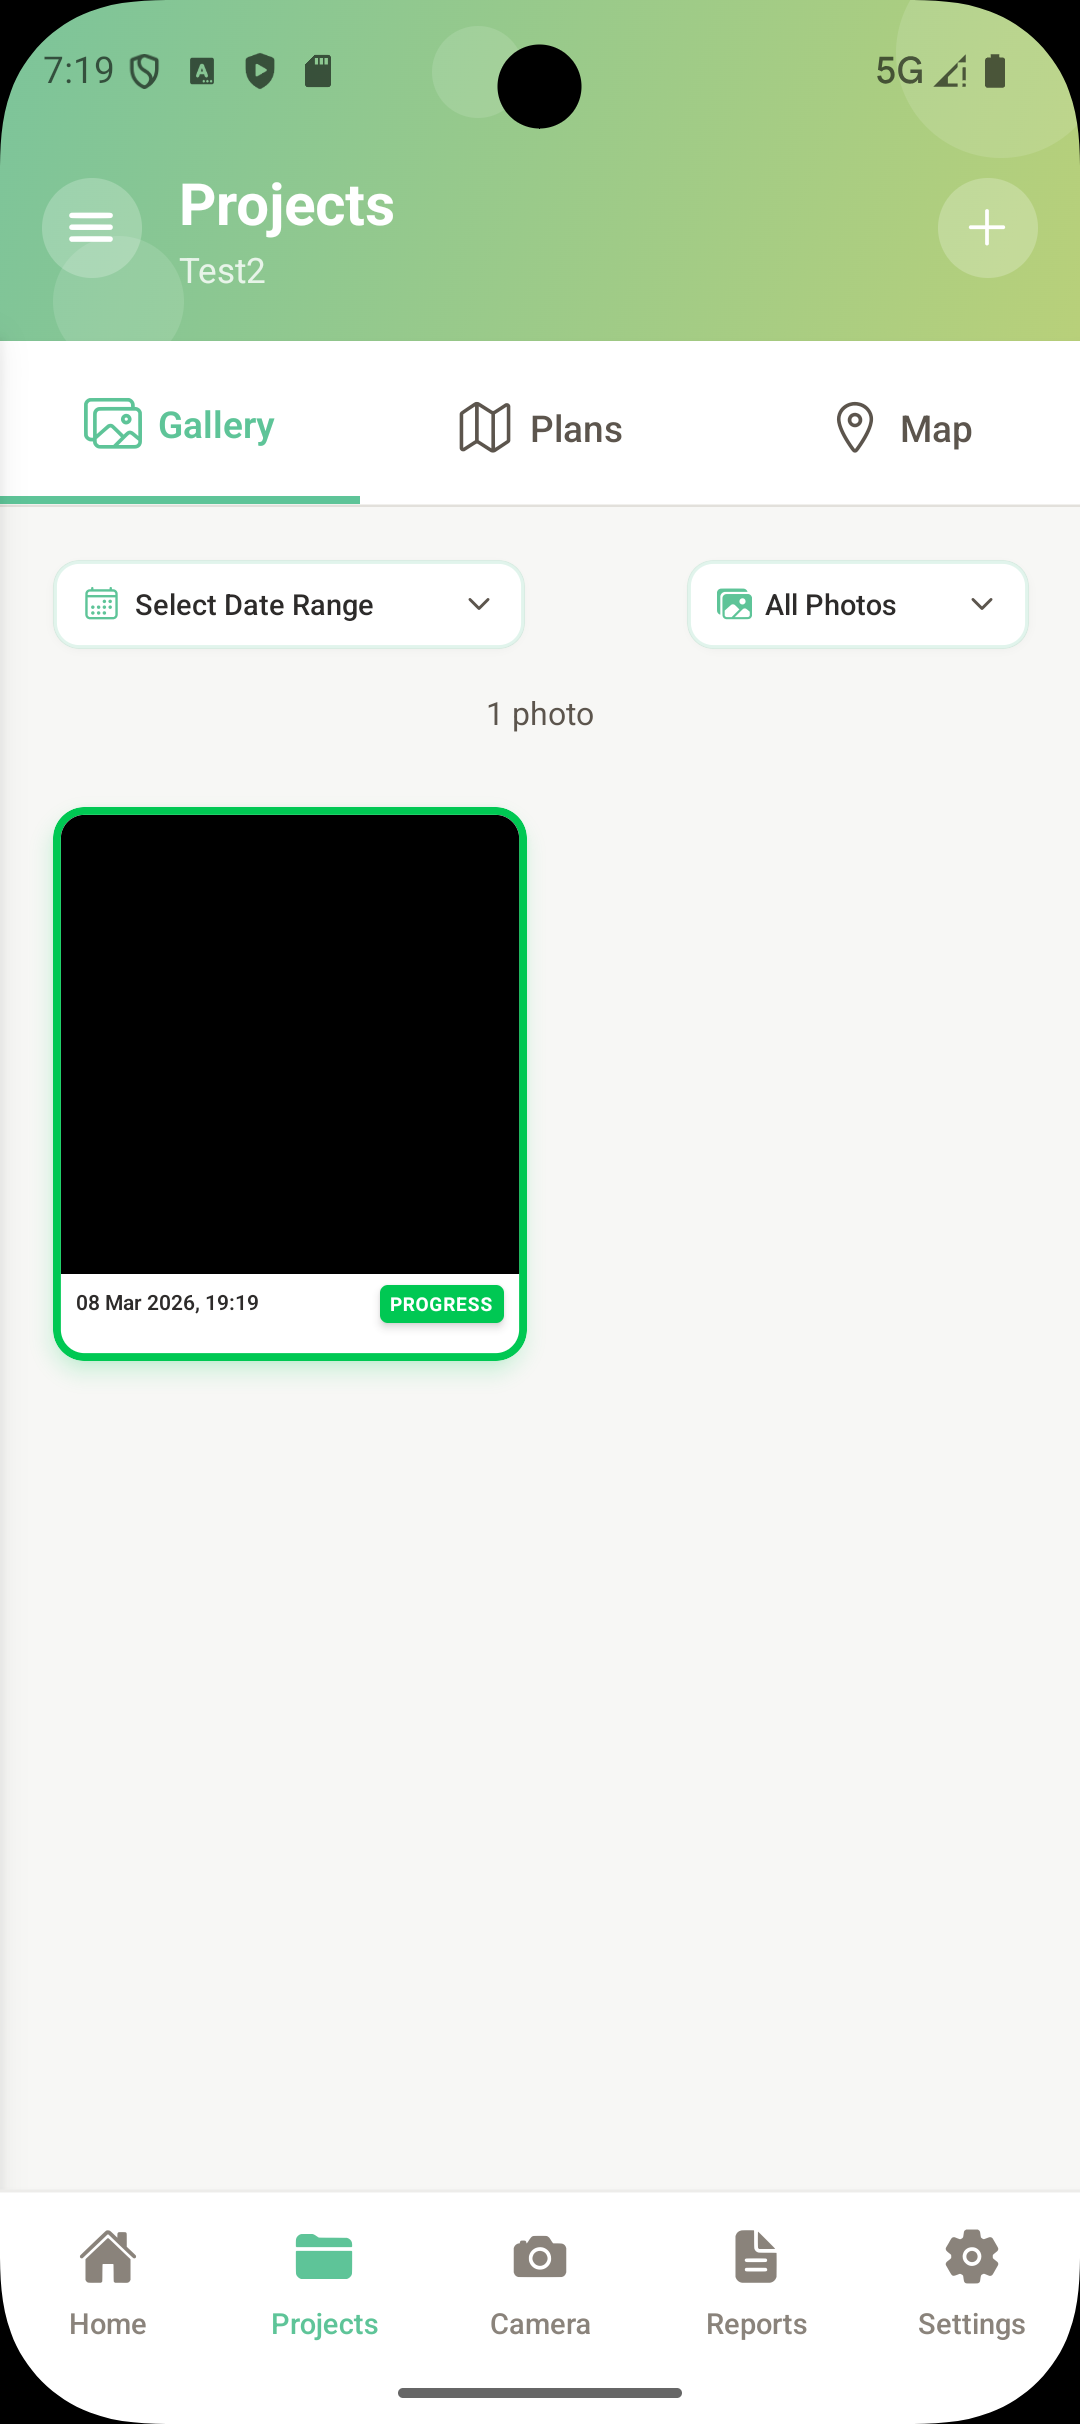
- Category — Progress, Issue, Inspection, or General. This makes filtering and reporting effortless later.
- Notes — What the issue is, its severity, and who is responsible. Write as if the reader has never visited the site.
- Floor plan pin — Tap the location on the plan where this photo belongs. Anyone reviewing the project can find exactly where each photo was taken.
Step 4: Annotate Key Findings
For important findings, draw directly on the photo. Circle defects, add arrows, write text labels. This makes the documentation unmistakable — no one needs to guess what you were pointing at.
Annotations are especially useful for cracks, water damage, misaligned elements, and anything where the exact location on the photo matters.
Step 5: Generate Your Report on Site
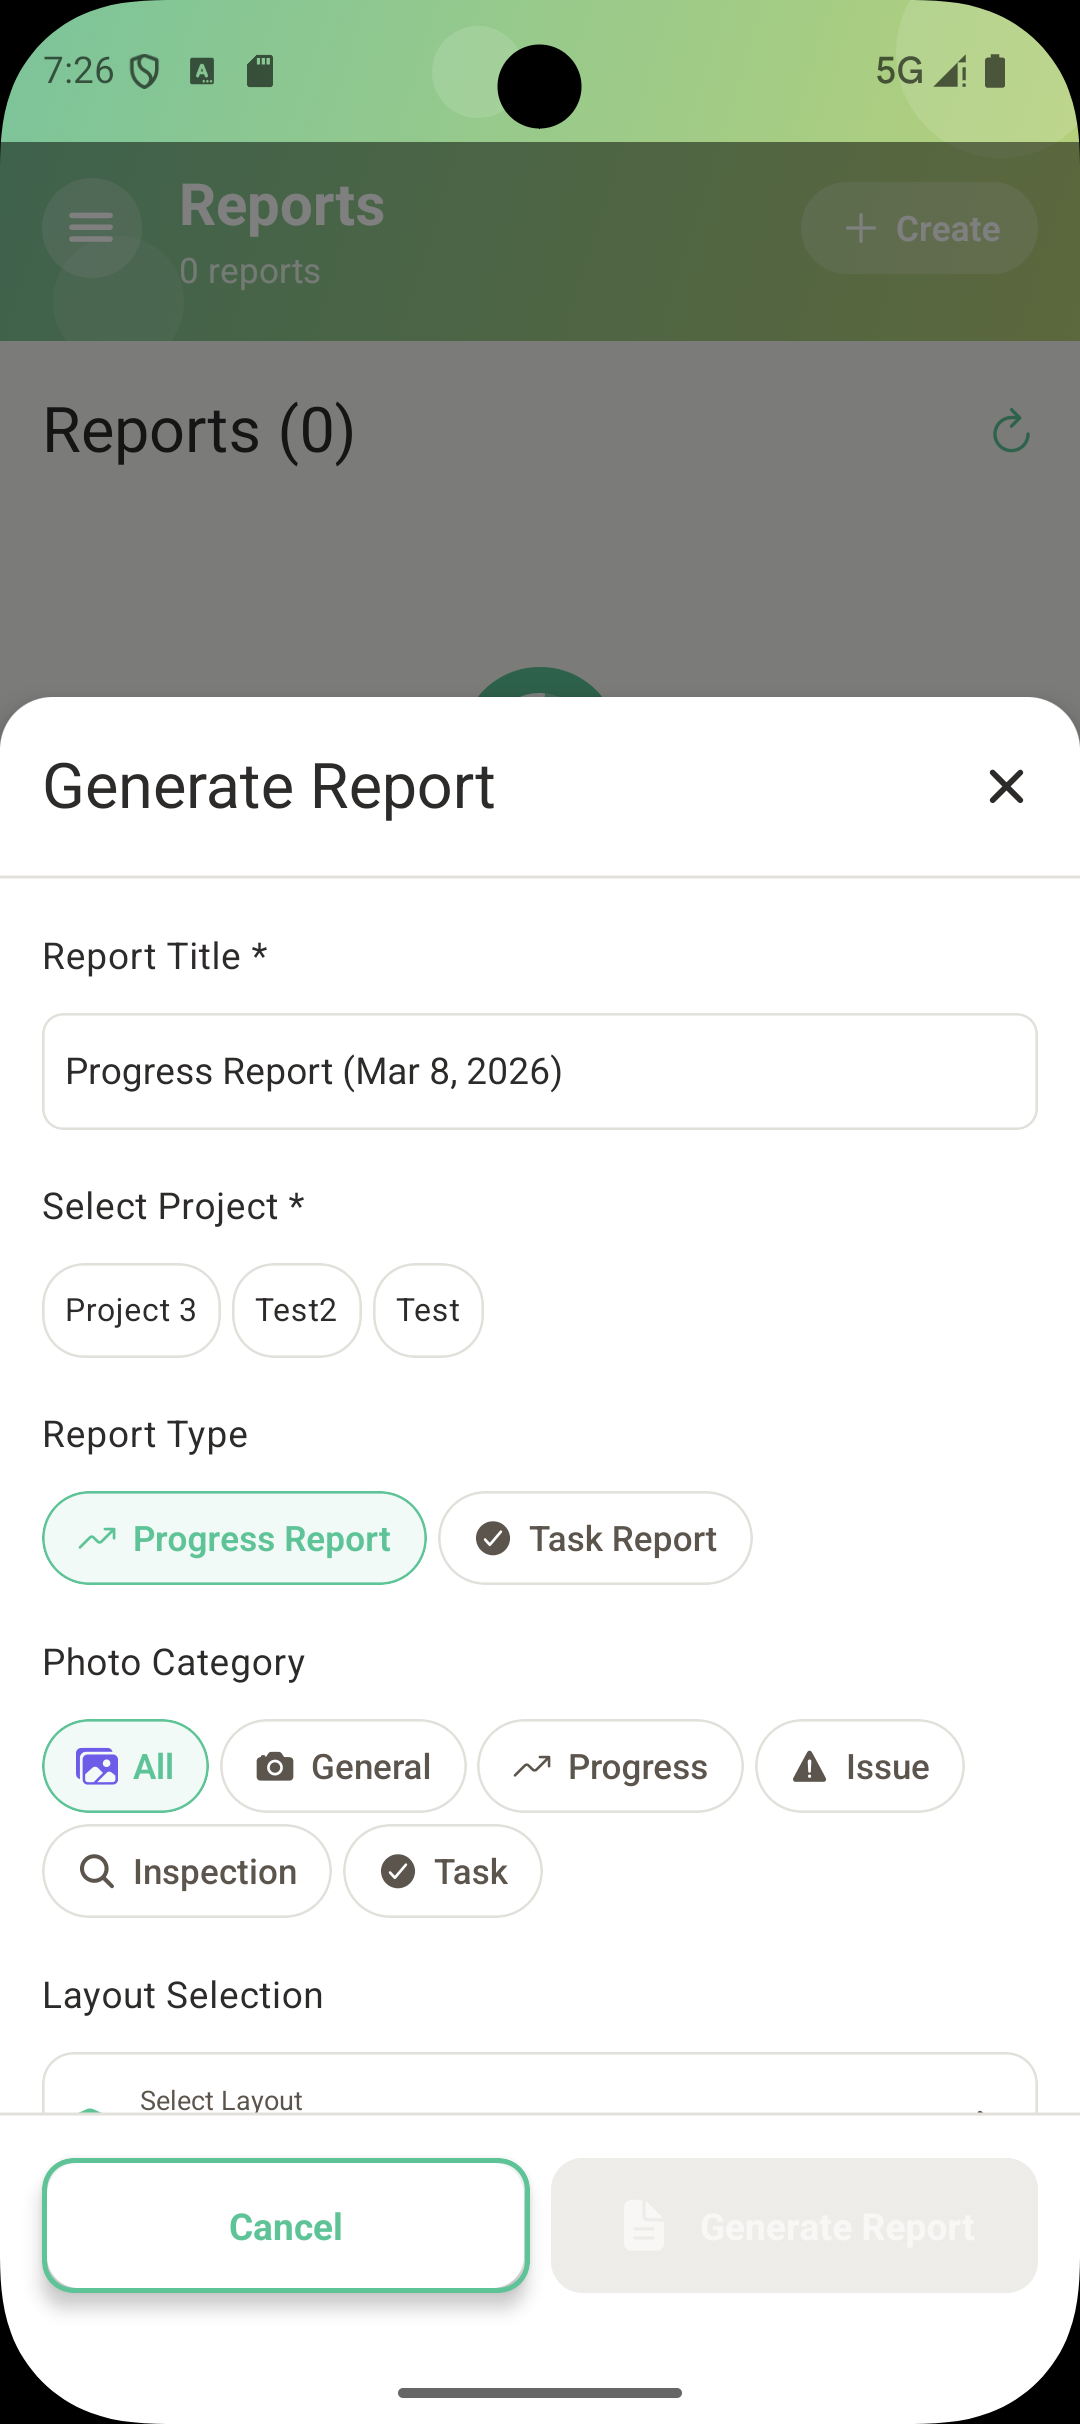
The biggest time sink in traditional inspections is the report — you take photos on site, then spend 2-4 hours back at the office organizing them into a document. Modern inspection apps eliminate this entirely.
With your photos already categorized, annotated, and pinned to floor plans, the app compiles everything into a formatted PDF in seconds. Choose a report type (Progress, Inspection, Issue, or Task), tap Generate, and share it before you leave the site.
Step 6: Sync and Back Up
Photos stored only on your phone are one drop away from being lost. Use an app that syncs to the cloud automatically. This ensures photos survive device loss, and your office staff can see field photos in real time without waiting for email attachments.